
Unlock Your Inner Pizzaiolo: The Easiest Homemade Dough Ever
Imagine biting into a slice of pizza: a perfectly crisp crust, a chewy interior, and that incredible aroma that only comes from fresh, well-made dough. What if we told you that restaurant-quality pizza is not only achievable in your home kitchen, but it’s also surprisingly simple? Forget expensive delivery or bland frozen pies. Today, we're diving into the delightful world of homemade pizza dough, and we promise to make it so easy, you'll wonder why you didn't start sooner!

The Pizza Dough Dream: Making Restaurant-Quality Pies at Home
Why Homemade is Best: Freshness, Flavor, and Fun!
There's an undeniable magic that happens when you create something from scratch, and pizza dough is no exception. The moment you pull a golden, bubbling pizza from your oven, you'll understand. Homemade dough offers unparalleled freshness, allowing you to control every ingredient, from the type of flour to the quality of the olive oil. This translates directly into superior flavor and texture that no store-bought or delivery option can match. Beyond taste, making pizza is an incredibly fun and interactive experience – perfect for family nights, impressing guests, or simply unwinding with a culinary project.

Conquering Dough Fear: It's Easier Than You Think!
Many home cooks shy away from making yeast dough, intimidated by the kneading, rising, and general 'science' of it all. We get it! But let us assure you: making pizza dough is far less complicated than you might imagine. This recipe is designed to be foolproof, guiding you through each step with clarity and confidence. We're going to demystify the process, turning what seems like a daunting task into a simple, enjoyable part of your cooking repertoire. Get ready to banish your dough fear for good!
Why This Dough Recipe Will Change Your Pizza Nights
Simple Ingredients, Amazing Results: A Recipe for Beginners
You don't need exotic flours or fancy equipment to make fantastic pizza dough. Our recipe relies on basic pantry staples – flour, water, yeast, salt, and a touch of olive oil. That’s it! With these humble ingredients and our easy-to-follow instructions, even absolute beginners will achieve a dough that’s pliable, flavorful, and bakes up into a crust worthy of a five-star pizzeria. Prepare to be amazed by the deliciousness that springs from simplicity.

From Freezer to Feast: Make Dough Ahead, Bake Anytime
Life gets busy, but that shouldn't stop you from enjoying homemade pizza. This recipe is incredibly versatile and perfect for meal prep. You can make a batch (or two!) of dough ahead of time and store it in the refrigerator for a few days, or even freeze it for future pizza emergencies. Imagine having perfectly portioned dough ready to go whenever a pizza craving strikes. It's convenience meets culinary excellence, transforming spontaneous weeknight dinners or last-minute gatherings into a delicious feast.
Let's Get Our Hands Dirty: The Foolproof Pizza Dough Recipe
Ready to create some magic? Here’s the step-by-step guide to your new favorite pizza dough.
Gathering Your Ingredients: A Quick Checklist
- 3 cups (360g) all-purpose flour or bread flour, plus more for dusting
- 1 teaspoon instant yeast (or active dry yeast, see FAQ)
- 1 teaspoon salt
- 1 tablespoon olive oil, plus more for the bowl
- 1 cup (240ml) warm water (105-115°F / 40-46°C)

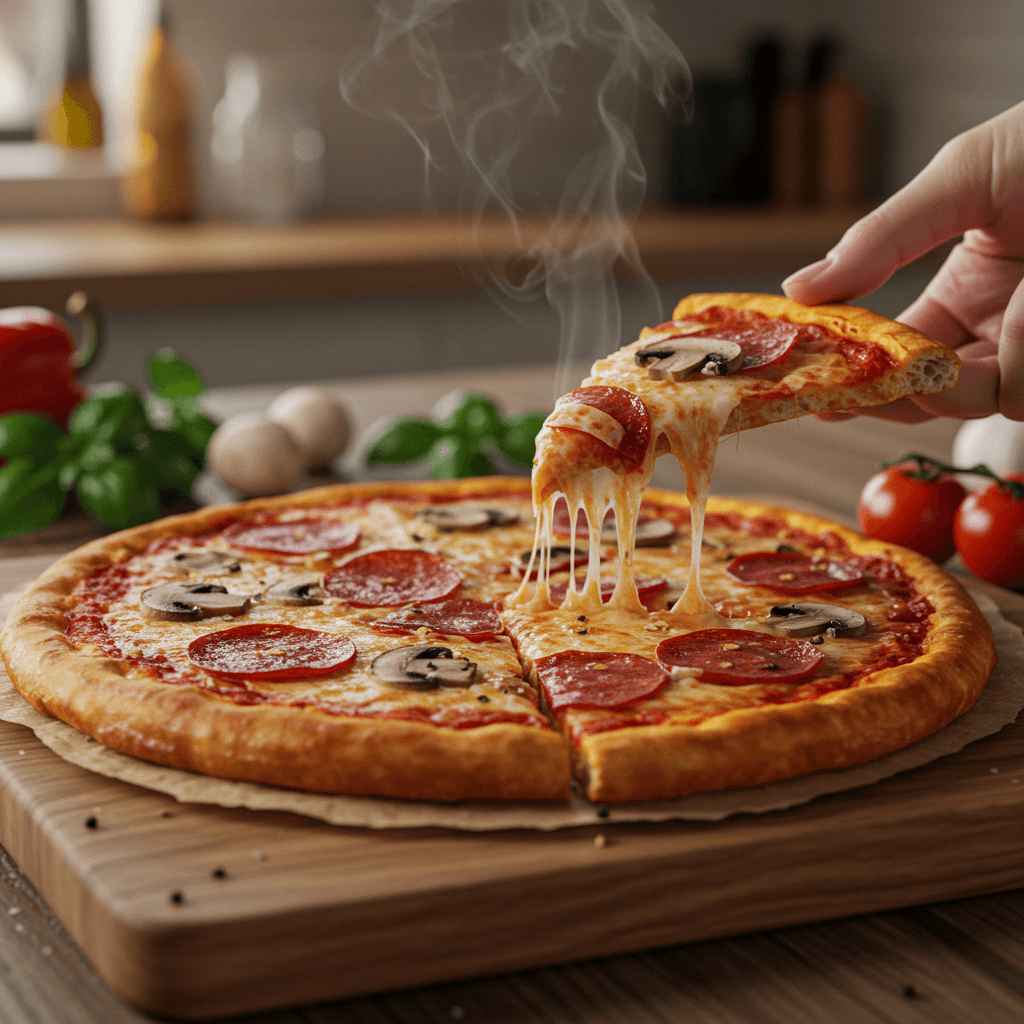
Step-by-Step Dough Making: Pictures and Video Guide
While we can't show you actual visuals here, imagine vibrant photos accompanying each step, guiding you visually to perfection. For a full visual walkthrough, we highly recommend checking out a supplementary video guide!
Mixing the Magic: Wet and Dry Ingredients Unite
- In a large mixing bowl, whisk together the flour, instant yeast, and salt. Make sure they are well combined.
- Create a well in the center of the dry ingredients. Pour in the warm water and the olive oil.
- Using a wooden spoon or your hands, stir from the center outwards, gradually incorporating the flour until a shaggy, somewhat sticky dough forms. Don't worry if it looks a bit messy at this stage; it's all part of the process!

Kneading the Perfect Texture: Tips for Success
- Lightly flour a clean work surface. Turn the dough out onto the floured surface.
- Knead the dough for 5-7 minutes. If kneading by hand, push the dough away from you with the heels of your hands, fold it back over, turn it a quarter turn, and repeat. If using a stand mixer with a dough hook, mix on low speed for 4-5 minutes.
- The dough should transform from sticky to smooth, elastic, and no longer sticking to your hands or the counter. It should feel soft and spring back when gently poked. ()

First Rise: Patience is Key
- Lightly oil a clean large bowl. Place the kneaded dough in the bowl, turning it once to coat all sides with oil.
- Cover the bowl tightly with plastic wrap or a clean kitchen towel.
- Let the dough rise in a warm, draft-free place for 60-90 minutes, or until it has doubled in size. This is where the yeast does its magical work, creating air pockets for that perfect crust. ()

Second Rise: Shaping Your Pizza Dream
- Once the dough has doubled, gently punch it down to release the air.
- Turn the dough out onto a lightly floured surface. Divide it into two equal portions for two medium pizzas, or leave it whole for one large pizza.
- Shape each portion into a smooth ball. Cover the dough balls loosely with plastic wrap or a kitchen towel and let them rest for another 15-20 minutes. This second, shorter rise allows the gluten to relax, making the dough much easier to stretch and shape without tearing.
Pro Tips for Pizza Perfection
Elevate your pizza game with these expert insights:
Flour Power: All-Purpose vs. Bread Flour
While all-purpose flour works wonderfully for a tender crust, bread flour (with its higher protein content) develops more gluten, resulting in a chewier, slightly crispier crust – a favorite for many pizzaiolos. Feel free to experiment with both to find your preference.
Yeast Wisdom: Ensuring a Successful Rise
Always check the expiration date on your yeast. Old yeast won't activate properly. Ensure your water is warm (105-115°F is ideal), not hot (which can kill the yeast) or cold (which won't activate it). If using active dry yeast, proof it first by dissolving it in the warm water with a pinch of sugar for 5-10 minutes until foamy, before adding it to the flour.
The Art of Kneading: Mastering the Technique
Don't be afraid to get a little aggressive with your dough during kneading! The goal is to develop the gluten, which gives pizza dough its structure and elasticity. A properly kneaded dough will be smooth, elastic, and will spring back when gently poked. If it tears easily, it needs a bit more kneading.
Stretching & Shaping: Avoid the Pizza Dough Disaster
Gentle hands are key here. After the second rise, lightly flour your surface and your hands. Start by gently pressing the dough from the center outwards, leaving a small lip for the crust. Avoid pressing down on the edges. You can then gently stretch it with your hands, drape it over your knuckles, or use a rolling pin if preferred (though hands give a more rustic texture). Don't force it; if the dough resists, let it rest for another 5-10 minutes before trying again.
Beyond the Basics: Creative Pizza Dough Ideas
Once you've mastered the basic dough, the possibilities are endless!
Flavor Infusion: Garlic and Herb Dough Variations
Add dried herbs like oregano, basil, or Italian seasoning directly into your dry ingredients. For a garlic kick, mix in a teaspoon of garlic powder or a tablespoon of finely minced fresh garlic with the wet ingredients. Imagine the aromatic base this creates for your pizza!
Experiment with Flours: Gluten-Free and Whole Wheat Options
For a heartier, nuttier crust, substitute up to half of the all-purpose flour with whole wheat flour. For gluten-free options, explore specialized gluten-free pizza flour blends (often found in the baking aisle). These usually require specific recipes, but the principle of homemade dough remains just as rewarding.
Pizza Pitfalls to Avoid: Troubleshooting Common Dough Issues
Even the best pizzaiolos encounter challenges. Here's how to fix common dough problems:
Troubleshooting a Soggy Bottom: What Went Wrong?
A soggy bottom is often due to too much moisture in the toppings, an oven that isn't hot enough, or not enough pre-baking (par-baking) of the crust. Ensure your oven is preheated to its highest setting (500-550°F / 260-290°C) with a pizza stone or steel if you have one. Consider par-baking your crust for 5-7 minutes before adding toppings, especially for wetter ingredients. Also, avoid overloading your pizza with toppings.
Fixing a Tough Dough: Recovery Strategies
If your dough feels tough, dense, and difficult to stretch, it's usually a sign of too much flour, over-kneading, or not enough resting time. If you suspect too much flour, try adding a tablespoon of water at a time during kneading until it reaches the right consistency. If it's over-kneaded, let it rest for a longer period (30-60 minutes) to allow the gluten to relax. Next time, be mindful of the kneading time and err on the side of slightly less flour.
Your Homemade Pizza Awaits: A Delicious Conclusion
Congratulations, you're now equipped with the knowledge and the recipe to create truly spectacular homemade pizza dough! This isn't just about making food; it's about the joy of creation, the aroma that fills your kitchen, and the shared delight of a meal made with love. So, roll up your sleeves, embrace your inner pizzaiolo, and get ready for the best pizza night of your life. Your taste buds (and your family/friends) will thank you.
Frequently Asked Questions
- Q: Can I use active dry yeast instead of instant yeast? A: Yes! If using active dry yeast, you'll need to activate it first. Dissolve the 1 teaspoon of active dry yeast in the 1 cup of warm water (ensure it's between 105-115°F or 40-46°C) with a pinch of sugar. Let it sit for 5-10 minutes until it becomes foamy. This shows the yeast is active. Then, proceed with the recipe, adding this mixture when the recipe calls for warm water and olive oil.
- Q: How long can I store the dough in the refrigerator? A: You can store the pizza dough in an airtight, oiled container in the refrigerator for up to 3-5 days. The flavor actually develops more over time! Just remember to bring it to room temperature for about 30-60 minutes before stretching and baking.
- Q: What's the best way to prevent sticking when stretching the dough? A: A light dusting of flour on your work surface and hands is usually sufficient. You can also lightly oil your hands or the counter. Avoid using too much flour, as it can make the dough tough. Gentle handling and allowing the dough to rest (especially after the second rise) will also make it less prone to sticking and tearing.
- Q: Can I freeze the pizza dough? A: Absolutely! After the first rise, punch down the dough, divide it into portions, shape them into balls, and lightly oil them. Wrap each ball tightly in plastic wrap, then place them in a freezer-safe bag. Dough can be frozen for up to 3 months. To use, thaw overnight in the refrigerator, then bring to room temperature for 30-60 minutes before stretching.
Share Your Pizza Success!
We absolutely love seeing your culinary creations! Share your homemade pizza masterpieces on social media using #MyHomemadePizzaiolo and tag us! (Imagine links to your Instagram, Facebook, and Pinterest here). Or, drop a comment below and tell us about your pizza journey – what toppings did you use? Any special tips? We can't wait to hear from you!


